Wondering How to Install Window Tint? Here’s the Process
Wondering how to install window tint for your home or office? Understand the basics with our one-stop guide now. Click to learn more.

Did you know that windows with poor energy efficiency account for nearly 40% of heat loss in buildings?
Installing window tints in your home can help improve energy efficiency and offer much more. It blocks out heat in the summer and helping to retain heat in the winter.
It can also increase your privacy, preventing people from looking from the outside. And it can enhance the appearance, giving your windows a sleek and modern look.
If you're considering knowing how to install window tint, it's important to follow a few key steps to ensure the best possible results. We'll outline the process of installing residential window tint in detail. Installing window tint is not a difficult process, but it does need some time, patience, and attention to detail.
By following these steps and using the right tools and techniques, you can install window tint and enjoy all the benefits it has to offer.
Step 1: Gather Materials
Before you begin to install window tint, it's important to make sure you have all the necessary materials. You'll need
- Window tint film
- Utility knife with a new blade
- Squeegee
- Spray bottle filled with water and some soap
- Masking tape or blue painter's tape
Have a few extra blades for the utility knife on hand, as well as some extra masking tape, in case you need them.
Step 2: Clean the Windows
The first step in installing window tint is to make sure the windows are completely clean. Any dirt, dust, or debris on the surface of the window will prevent the tint from adhering properly.
Use a glass cleaner and a microfiber clothing to clean the windows. Be sure to get the edges of the window as well, as this is where the tint film will be applied.
Step 3: Measure and Cut the Film
Measure the windows you'll be tinting and cut the tint film to the appropriate size. This can be a bit tricky, so take your time and be as accurate as possible.
It's best to cut the film a little larger than the actual window, as this will allow you to trim to the exact size later on. Use a straight edge and a ruler to mark the film, and then use the utility knife to carefully cut it to size.
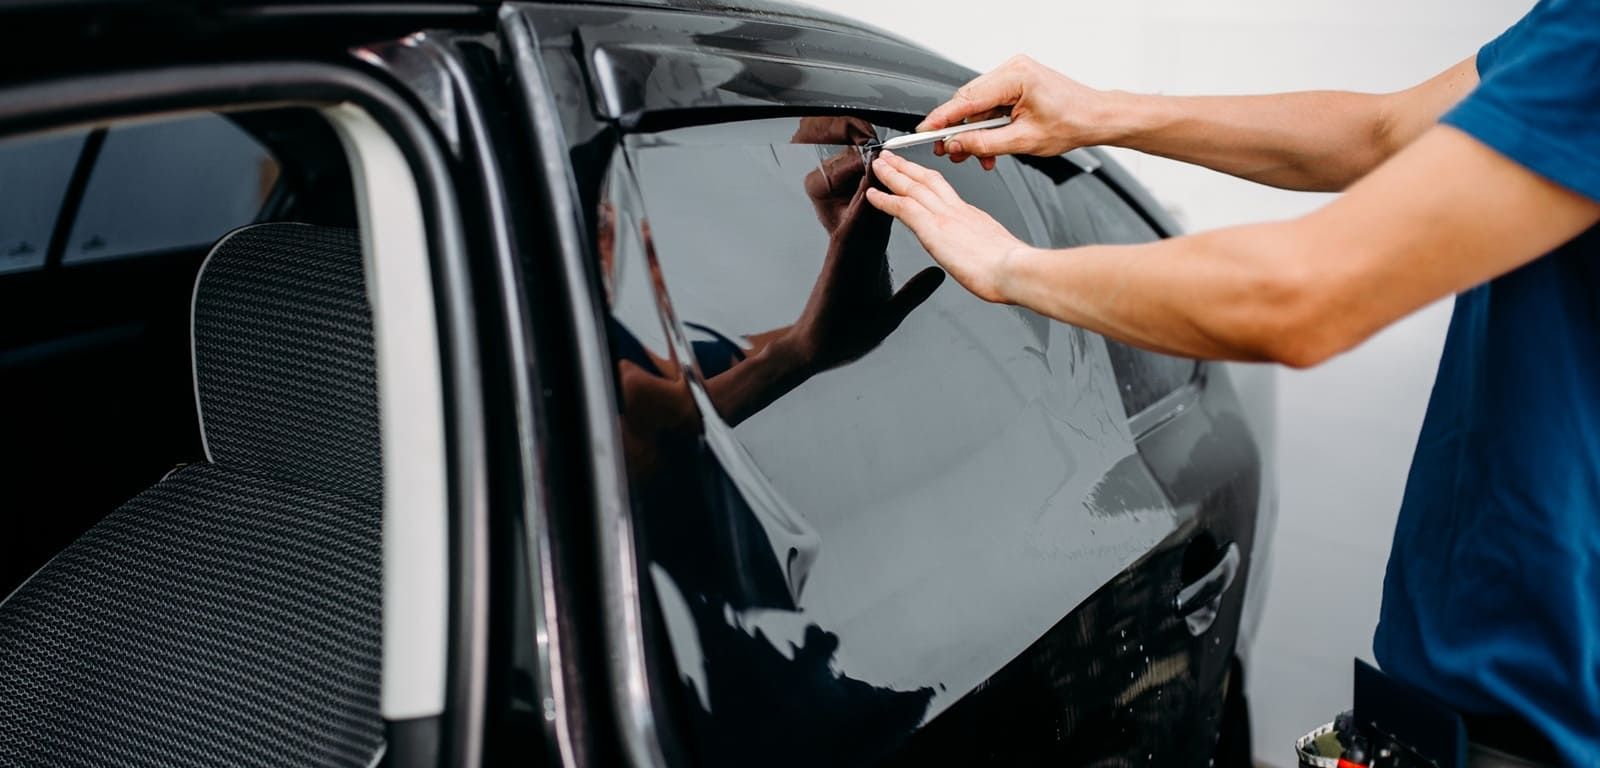
Step 4: Remove the Backing
Once the film is cut to size, carefully peel the protective backing off of the tint film. Be sure to handle the film as little as possible, as fingerprints and other contaminants can cause bubbles and wrinkles in the final product.
If the film has a grid pattern on the backing, use it to help you align the film with the window.
Step 5: Spray the Window
Spray the window with the water and soap solution. This will help you position the tint film and make it easier to adjust if necessary.
It will also aid in the adhesion of the film. Be sure to spray the window evenly and avoid getting the solution on any surfaces that the tint film won't be covering.
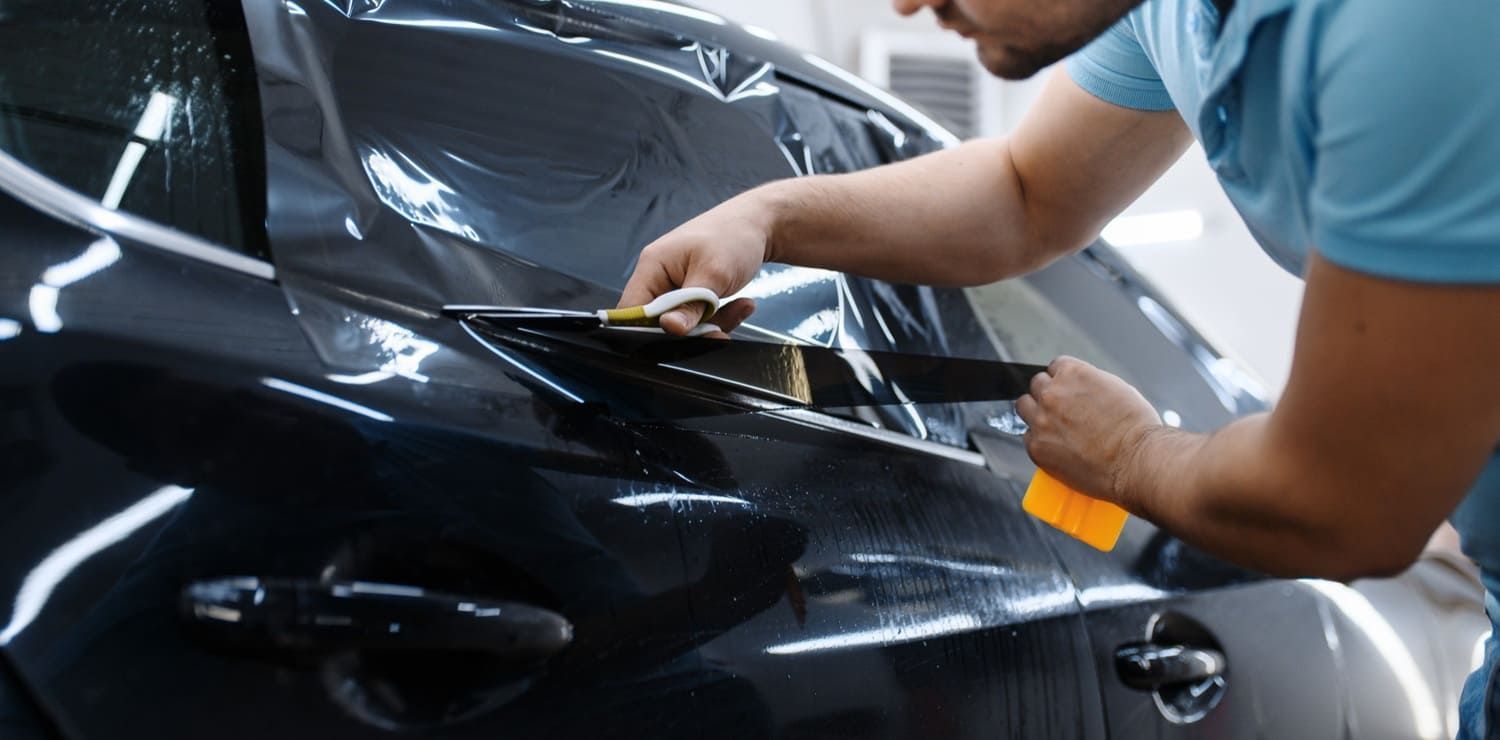
Step 6: Apply the Film
Once the window is wet, carefully apply the tint film to the window, smoothing out any bubbles or wrinkles as you go. Use the squeegee to push out any remaining bubbles.
Start in the middle of the film and work your way out toward the edges. Be sure to smooth out any creases or wrinkles as you go, as these can be difficult to remove once the film is in place.

Step 7: Squeegee the Film
Once you are done applying window tint, use the squeegee to push out any remaining bubbles and press the film into place.
Use the edge of a credit card or similar tool to press out any bubbles along the edges of the window. Be sure to work slowly and methodically, as this will help to ensure that the film adheres properly.
Step 8: Dry the Film
Allow the tint to dry for a few hours before carefully trimming away any excess film around the edges of the window.
You can use the utility knife or a pair of scissors to trim the film, but be sure to do it slowly and carefully to avoid damaging the film or the window.
Step 9: Remove the Masking Tape
Once the tint film has had a chance to dry for a few hours, it's time to remove the masking or painter's tape. Be sure to do this slowly and carefully to avoid damaging the film or the window.
To remove the tape, gently lift one corner of the tape and slowly peel it away from the window. If the tape is sticking particularly well, you may need to use a fingernail or a tool with a thin edge to gently lift it away from the surface.
Finally, give the window one last cleaning with a microfiber cloth to remove any dirt or debris that may have accumulated during the installation process. Once the window is clean, you can sit back and enjoy your newly tinted windows.
What to Note When Installing a Window Tint
It's important to note that the process of window tint installation may vary slightly depending on the type of window and the tint film you're using. Always read and follow the manufacturer's instructions for your specific window tint film to ensure the best possible results.
If you're not comfortable doing the window tint application yourself, or if you don't have the necessary tools and experience, consider hiring professional window tint installers for the job. They will have the skills and expertise to ensure that the tint is applied correctly and that your windows look great when they're finished.
Need Help on How to Install Window Tint? Call Latitude Window Tint
Learning how to Install window tint can be quite a challenging process. Follow these steps and you'll be well on your way to enjoying the benefits of tinted windows in your home.
Looking for fast and professional window tinting services? Contact us today. Latitude 33 Window Tint serve the Columbia, Richland County, Lexington County, Sumter County, and surrounding areas.